> ## Documentation Index
> Fetch the complete documentation index at: https://docs.anodyne-productions.com/llms.txt
> Use this file to discover all available pages before exploring further.
# Posting
> Learn about Nova's posting system
## What is a post?
At the core of any online role-playing game are the myriad of stories the players want to explore. These stories (also called *Missions*) are told via a collection of posts. Unlike play-by-email or play-by-forum platforms which force users to write their portions alone, Nova's unique posting system allows multiple writers to collaborate with their storytelling.
Three different post types are available to all users in Nova:
1. **Mission Post**: a solo or joint post which provides a chapter in a game's larger story. These posts are always attached to specific **Missions**.
2. **Personal Log**: a smaller, shorter entry system which allows a unique look at a character's thought process or emotions. This is much like Data's multiple personal logs in the *Star Trek* episode "Data's Day".
3. **News Item**: an announcement or other type of notice that goes out to all players belonging to the game.
## Writing a post
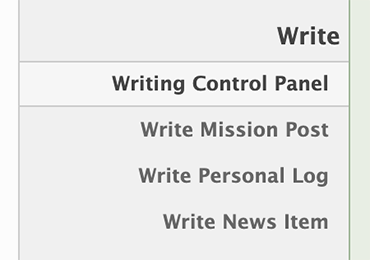
Posts can be written and published by any player of a particular game. To do so, players simply log into the game's site and access the **Writing Control Panel**, which is available by:
1. The *Admin Control Panel* under the *Write* subheader. (*Note that direct access to all three post types are available here as well.*)
 2. The *Writing Entries* icon located above the main header.
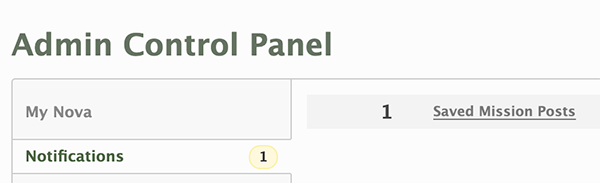
 3. The *Admin Control Panel* via the access panel's *Notifications* section (if you already have at least 1 saved post in the system).
 Once you have accessed the Writing Control Panel, you will be able to select which type of post you wish to create.
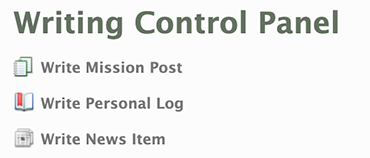 Each post type will have a different set of available fields, including:
* *Authors*: select the character(s) that will be represented within the post you (or others) are writing.
* *Mission*: select the mission your story will be a part of (Mission Post only).
* *Title*: the title of the post.
* *Location* and *Timeline*: the location and time that the Mission Post takes place (Mission Post only).
* *Category*: the specific category a News Item is connected to (News Item only).
* *Public*: select whether or not your News Item can be seen by anyone not logged into the Nova site, including visitors (News Item only).
* *Content*: the content of the post, ranging from the written post or log text, or the content of the news item.
* *Tags*: metadata tags to assist Nova's search feature in finding the post any time after it is published.
Four different options are available for each post type.
Each post type will have a different set of available fields, including:
* *Authors*: select the character(s) that will be represented within the post you (or others) are writing.
* *Mission*: select the mission your story will be a part of (Mission Post only).
* *Title*: the title of the post.
* *Location* and *Timeline*: the location and time that the Mission Post takes place (Mission Post only).
* *Category*: the specific category a News Item is connected to (News Item only).
* *Public*: select whether or not your News Item can be seen by anyone not logged into the Nova site, including visitors (News Item only).
* *Content*: the content of the post, ranging from the written post or log text, or the content of the news item.
* *Tags*: metadata tags to assist Nova's search feature in finding the post any time after it is published.
Four different options are available for each post type.
 1. *Post*: this option is to be used only when you (or all authors) are ready to share the finished product with all players on the game. Once "Posted", the completed post will be emailed to all players, and it will be publicly visible to anyone on the Nova site.
2. *Save*: this option is used primarily to:
* save your work as you are writing, should you need to take a break and come back to it later;
* or when you have completed your portion of a joint post while writing with other players.
3. *Delete*: this option may not be available until after the first time the post is saved. If you decide to delete a post, it will be deleted forever and can't be recovered from the site.
4. *Back to Writing Control Panel*: if you decide not to create or edit a saved post, this option allows you to leave without making any changes.
## Viewing saved posts
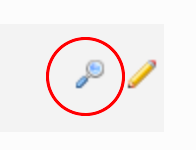
To view or read a post that you have saved but don't wish to edit, access the *Writing Control Panel* and select the **Magnifying Glass** icon next to the post you wish to view.
1. *Post*: this option is to be used only when you (or all authors) are ready to share the finished product with all players on the game. Once "Posted", the completed post will be emailed to all players, and it will be publicly visible to anyone on the Nova site.
2. *Save*: this option is used primarily to:
* save your work as you are writing, should you need to take a break and come back to it later;
* or when you have completed your portion of a joint post while writing with other players.
3. *Delete*: this option may not be available until after the first time the post is saved. If you decide to delete a post, it will be deleted forever and can't be recovered from the site.
4. *Back to Writing Control Panel*: if you decide not to create or edit a saved post, this option allows you to leave without making any changes.
## Viewing saved posts
To view or read a post that you have saved but don't wish to edit, access the *Writing Control Panel* and select the **Magnifying Glass** icon next to the post you wish to view.
 ## Writing joint posts
Many games encourage players to write with one another and not on their own. This method is commonly referred to as **Joint Posts**. Nova allows players to write together with ease, and the Writing Control Panel will show players all Saved Posts that they are involved in.
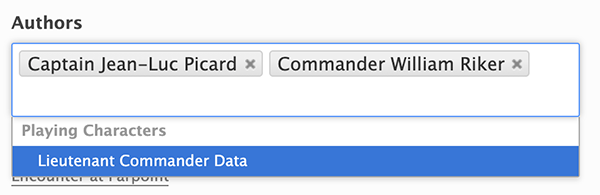
To start a saved post, access the *Writing Control Panel* and select **Write Mission Post**. Under the *Author* dropdown, select all characters that will be participating in the joint post.
## Writing joint posts
Many games encourage players to write with one another and not on their own. This method is commonly referred to as **Joint Posts**. Nova allows players to write together with ease, and the Writing Control Panel will show players all Saved Posts that they are involved in.
To start a saved post, access the *Writing Control Panel* and select **Write Mission Post**. Under the *Author* dropdown, select all characters that will be participating in the joint post.
 Add your first contribution to the post and then click **Save**. Not only will Nova save the post in its system, but it will notify all other players that are involved in the joint post. Notification methods include:
All authors will be emailed a copy of the current state of the post.
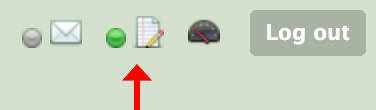
A green light will appear on the **Writing Entries** icon above the page header on the website, as well as an icon next to the post in the player's Writing Control Panel.
Add your first contribution to the post and then click **Save**. Not only will Nova save the post in its system, but it will notify all other players that are involved in the joint post. Notification methods include:
All authors will be emailed a copy of the current state of the post.
A green light will appear on the **Writing Entries** icon above the page header on the website, as well as an icon next to the post in the player's Writing Control Panel.
 A number will appear next to the **Notifications** box on the Control Panel page.
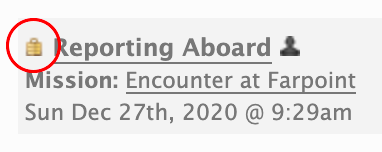
Though a post can have multiple authors, only one player can contribute at a time. This is a safety mechanism to prevent players from accidentally wiping out another player's work. Once a player decides to edit the post, a lock will be placed on the post to keep other players from contributing until the lock is released.
A number will appear next to the **Notifications** box on the Control Panel page.
Though a post can have multiple authors, only one player can contribute at a time. This is a safety mechanism to prevent players from accidentally wiping out another player's work. Once a player decides to edit the post, a lock will be placed on the post to keep other players from contributing until the lock is released.
 The post lock can be released by:
* *Saving* the post;
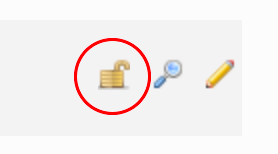
* *Returning* to the Writing Control Panel (without saving), and clicking on the open lock icon; or
The post lock can be released by:
* *Saving* the post;
* *Returning* to the Writing Control Panel (without saving), and clicking on the open lock icon; or
 * a *Session Timeout* after five minutes of inactivity.
When all authors of a joint post agree that the post is complete, elect one person to publish the post by clicking **Post**.
## Editing a published post
On occasion, there may be a need to edit an already published post. Users can edit posts they were a participant of by:
1. Accessing their character's bio.
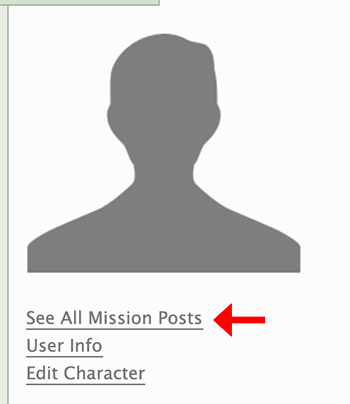
2. Clicking on *See All Mission Posts*.
* a *Session Timeout* after five minutes of inactivity.
When all authors of a joint post agree that the post is complete, elect one person to publish the post by clicking **Post**.
## Editing a published post
On occasion, there may be a need to edit an already published post. Users can edit posts they were a participant of by:
1. Accessing their character's bio.
2. Clicking on *See All Mission Posts*.
 3. Selecting the post they wish to edit.
4. Click the **Edit** button underneath the post's title.
Nova will not issue any notifications to any player or manager that a post is edited. Therefore, it is recommended that any post editing be coordinated with the game's management staff before continuing.
If necessary, any user with an Administration access role can change the status of a published post. This happens primarily when a saved post is accidentally published before it is complete. Upon editing the post, the administrator can change the status from **Activated** back to **Saved**.
## Advanced options
Let's take a look at several advanced options available to those with at least the *Basic Administration* access role, or roles with *Manage Posts (Level 2)*, and *Manage Missions* permissions enabled.
### Moderating posts
If the game's management elects to preview all posts written by a selected player before they are published:
1. Via the *Control Panel*, locate the *User* submenu on the sidebar and select **All Users**.
3. Selecting the post they wish to edit.
4. Click the **Edit** button underneath the post's title.
Nova will not issue any notifications to any player or manager that a post is edited. Therefore, it is recommended that any post editing be coordinated with the game's management staff before continuing.
If necessary, any user with an Administration access role can change the status of a published post. This happens primarily when a saved post is accidentally published before it is complete. Upon editing the post, the administrator can change the status from **Activated** back to **Saved**.
## Advanced options
Let's take a look at several advanced options available to those with at least the *Basic Administration* access role, or roles with *Manage Posts (Level 2)*, and *Manage Missions* permissions enabled.
### Moderating posts
If the game's management elects to preview all posts written by a selected player before they are published:
1. Via the *Control Panel*, locate the *User* submenu on the sidebar and select **All Users**.
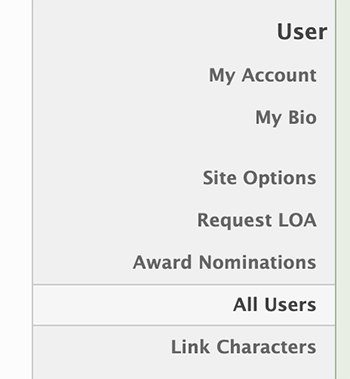 2. Click the **Edit** icon for the user you wish to moderate.
 3. Click on the **Admin** tab.
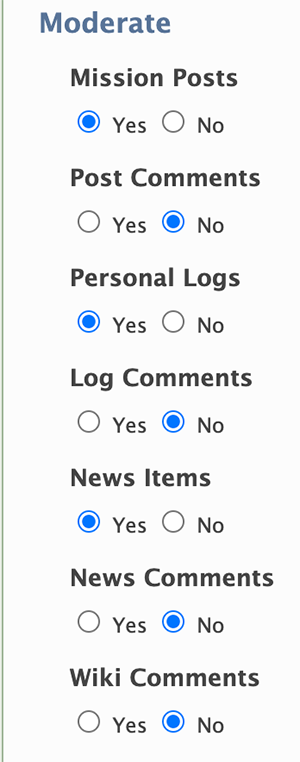
4. Under the **Moderate** header, select any or all items you wish that user to be moderated for.
3. Click on the **Admin** tab.
4. Under the **Moderate** header, select any or all items you wish that user to be moderated for.
 5. Click **Update** to save your changes.
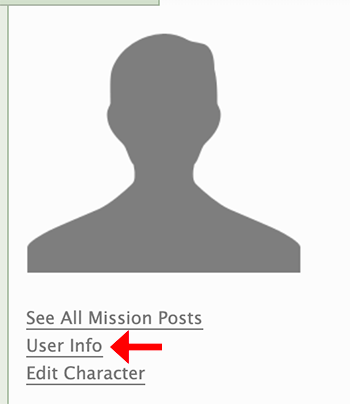
You can also access the User's profile by accessing a bio for a character and selecting **User Info**.
5. Click **Update** to save your changes.
You can also access the User's profile by accessing a bio for a character and selecting **User Info**.
 ### Missions and mission groups
As chapters are structured within a book and acts within a play, Mission Posts are structured within a **Mission**. For example, in *Star Trek*, a mission would be considered as a complete episode. Nova allows you to have multiple missions active at a time, but you must have at least one mission active for your players to be able to write.
### Creating, editing, and organizing missions
To create a new mission, access Nova's Control Panel and locate **Missions** under the management subheader. This will take you to the **Manage Missions Page**.
### Missions and mission groups
As chapters are structured within a book and acts within a play, Mission Posts are structured within a **Mission**. For example, in *Star Trek*, a mission would be considered as a complete episode. Nova allows you to have multiple missions active at a time, but you must have at least one mission active for your players to be able to write.
### Creating, editing, and organizing missions
To create a new mission, access Nova's Control Panel and locate **Missions** under the management subheader. This will take you to the **Manage Missions Page**.
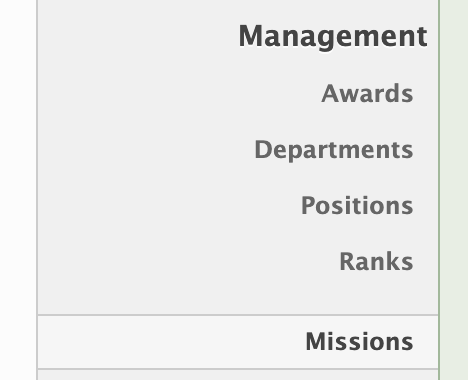 You can also add or edit missions through the Missions page (via the Sim link on the *main menu*, and then **Missions** on the sidebar).
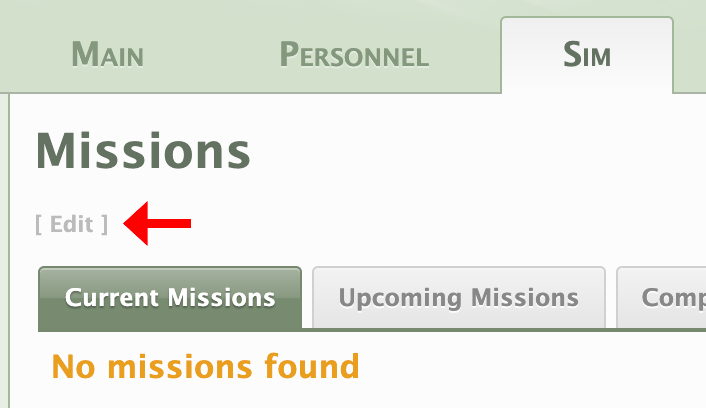 To add a mission:
1. Click on **Add Mission**.
2. Enter all relevant information:
* *Title*: the name of the mission.
* *Status*: one of three selectable options representing the availability of the mission:
* *Current Mission*: indicates that this mission is available and open for all players to contribute to.
* *Upcoming Mission*: indicates that this mission is one of the game's future stories. No one will be able to add to this mission.
* *Completed Mission*: indicates that this mission is finished. No one will be able to add to this mission, but existing posts can still be edited.
* *Order*: enter a value from `0` (first in line) to `99` (last in line).
* *Mission Group*: if you are using Mission Groups to organize a multitude of missions, select a mission group that you created to insert this mission into.
* *Start and End Date*: select a start and end date using the datepicker. These dates do not govern a mission's availability, but instead inform your players when you wish to begin and complete missions.
* *Description*: enter a short description of the mission that can be viewed by anyone on the mission page.
* *Summary*: enter a full summary of the mission as it progresses, or once the mission is completed.
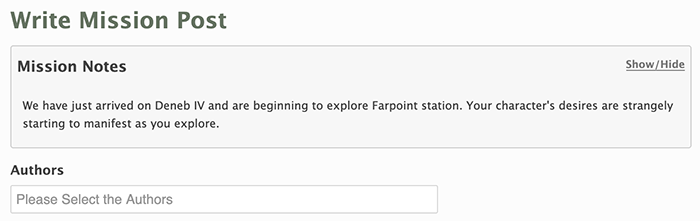
* *Notes*: if there are notes regarding the mission you wish to convey to your players (e.g. in-character timeframe, data on the environment the characters are visiting, restrictions on gameplay, etc.) enter it here. These notes will be visible when players are on the **Write Mission Posts** page.
To add a mission:
1. Click on **Add Mission**.
2. Enter all relevant information:
* *Title*: the name of the mission.
* *Status*: one of three selectable options representing the availability of the mission:
* *Current Mission*: indicates that this mission is available and open for all players to contribute to.
* *Upcoming Mission*: indicates that this mission is one of the game's future stories. No one will be able to add to this mission.
* *Completed Mission*: indicates that this mission is finished. No one will be able to add to this mission, but existing posts can still be edited.
* *Order*: enter a value from `0` (first in line) to `99` (last in line).
* *Mission Group*: if you are using Mission Groups to organize a multitude of missions, select a mission group that you created to insert this mission into.
* *Start and End Date*: select a start and end date using the datepicker. These dates do not govern a mission's availability, but instead inform your players when you wish to begin and complete missions.
* *Description*: enter a short description of the mission that can be viewed by anyone on the mission page.
* *Summary*: enter a full summary of the mission as it progresses, or once the mission is completed.
* *Notes*: if there are notes regarding the mission you wish to convey to your players (e.g. in-character timeframe, data on the environment the characters are visiting, restrictions on gameplay, etc.) enter it here. These notes will be visible when players are on the **Write Mission Posts** page.
 3. Click **Submit**.
After a mission is added to the system, you can add image(s) to the mission that can be viewed by anyone.
1. Access the **Manage Missions** page as described above.
2. Click on the **edit icon**.
3. Select the **Images** tab.
4. Click on **Upload Images**.
3. Click **Submit**.
After a mission is added to the system, you can add image(s) to the mission that can be viewed by anyone.
1. Access the **Manage Missions** page as described above.
2. Click on the **edit icon**.
3. Select the **Images** tab.
4. Click on **Upload Images**.
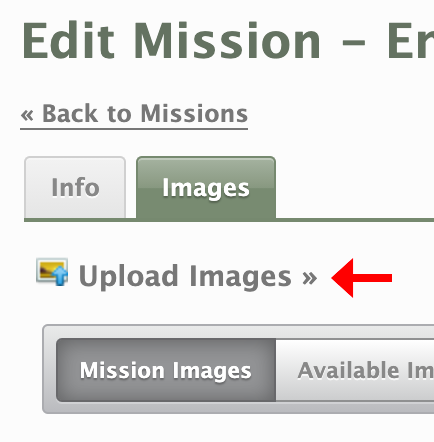 5. Upload your image(s) one at a time, being sure to select **Mission Image** as the Image Type.
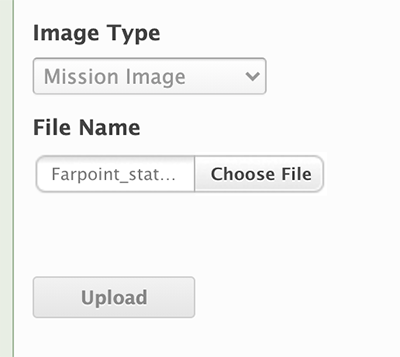 6. Return to the **Manage Missions** page.
7. Select the **Images** tab.
8. Select the **Available Images** tab.
9. Locate your image(s) and click **Select Image**
6. Return to the **Manage Missions** page.
7. Select the **Images** tab.
8. Select the **Available Images** tab.
9. Locate your image(s) and click **Select Image**
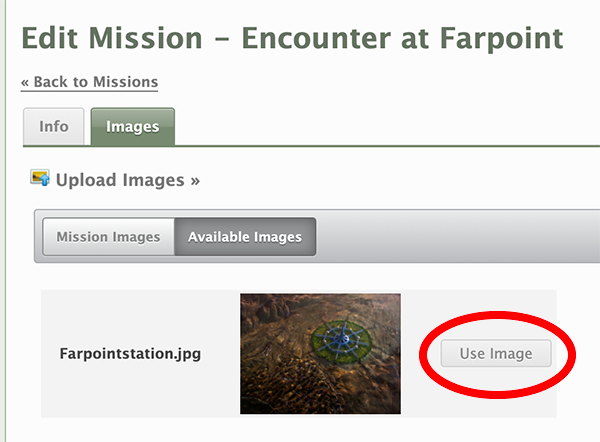 10. Return to the **Mission Images** tab and arrange your images in any order. Click **Update**.
11. Click on the **Info** tab.
12. Click **Submit** at the bottom of the form.
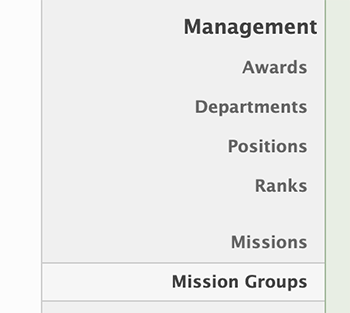
### Creating a new mission group
Missions can be organized within **Mission Groups**, much like how episodes of a television show are organized into a season or series.
10. Return to the **Mission Images** tab and arrange your images in any order. Click **Update**.
11. Click on the **Info** tab.
12. Click **Submit** at the bottom of the form.
### Creating a new mission group
Missions can be organized within **Mission Groups**, much like how episodes of a television show are organized into a season or series.
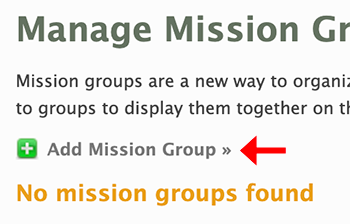 * *Name*: the name of the Mission Group.
* *Parent Mission Group*: decide whether or not this mission group will be nested within another group.
* *Order*: enter a value from `0` (first in line) to `99` (last in line).
* *Description*: enter a brief description as to what the Mission Group is about.
* *Name*: the name of the Mission Group.
* *Parent Mission Group*: decide whether or not this mission group will be nested within another group.
* *Order*: enter a value from `0` (first in line) to `99` (last in line).
* *Description*: enter a brief description as to what the Mission Group is about.