What are ranks?
Many online RPGs attach a rank to characters to denote a certain status/hierarchy in-character. For example, a character in Star Trek could be a Lieutenant while a character in Star Wars might be a Jedi Knight and a character in Firefly could be a Civilian. Nova is designed to handle both complex and simple rank structures. To understand how best to use this structure, it helps to understand the terms Nova uses for organzing ranks:- A rank is the name of a particular level in a rank hierarchy. For example, Captain, Ensign, Colonel, Glinn, Procounsel, Civilian, etc.
- A rank class is a collection of ranks, usually used to organize ranks by a department and/or division. For example, in Star Trek the Command Department uses red backgrounds and all ranks that use that color background will have the same rank class.
- A rank set is a complete collection of stylized rank images. Most Nova installers come with a full set of these images customized for that genre, such as DS9, TOS Movie Era, seaQuest, etc. Additional rank sets are available at the Nova Add-ons Exchange or Kuro-RPG.
Permissions
To view and edit Ranks, rank classes, and rank sets, you must have at least the Basic Administration access role, or your access role needs to have the Manage Ranks feature enabled. Typically, this feature is reserved for those who are managing the game. Additionally, to add rank sets you will need to have direct access to your site’s files either through an FTP client or through cPanel/Plesk’s File Manager.Viewing ranks
From the Rank Management page, you will be able to view all ranks. In Nova’s Control Panel, locate Ranks under the Management subheader in the sidebar. All available rank sets and rank classes will be displayed at the top of the page. Individual rank sets will be denoted by a single preview image and rank classes within a rank set will be displayed by a preview image of each color. You can click on the desired class image to display all ranks in that rank class.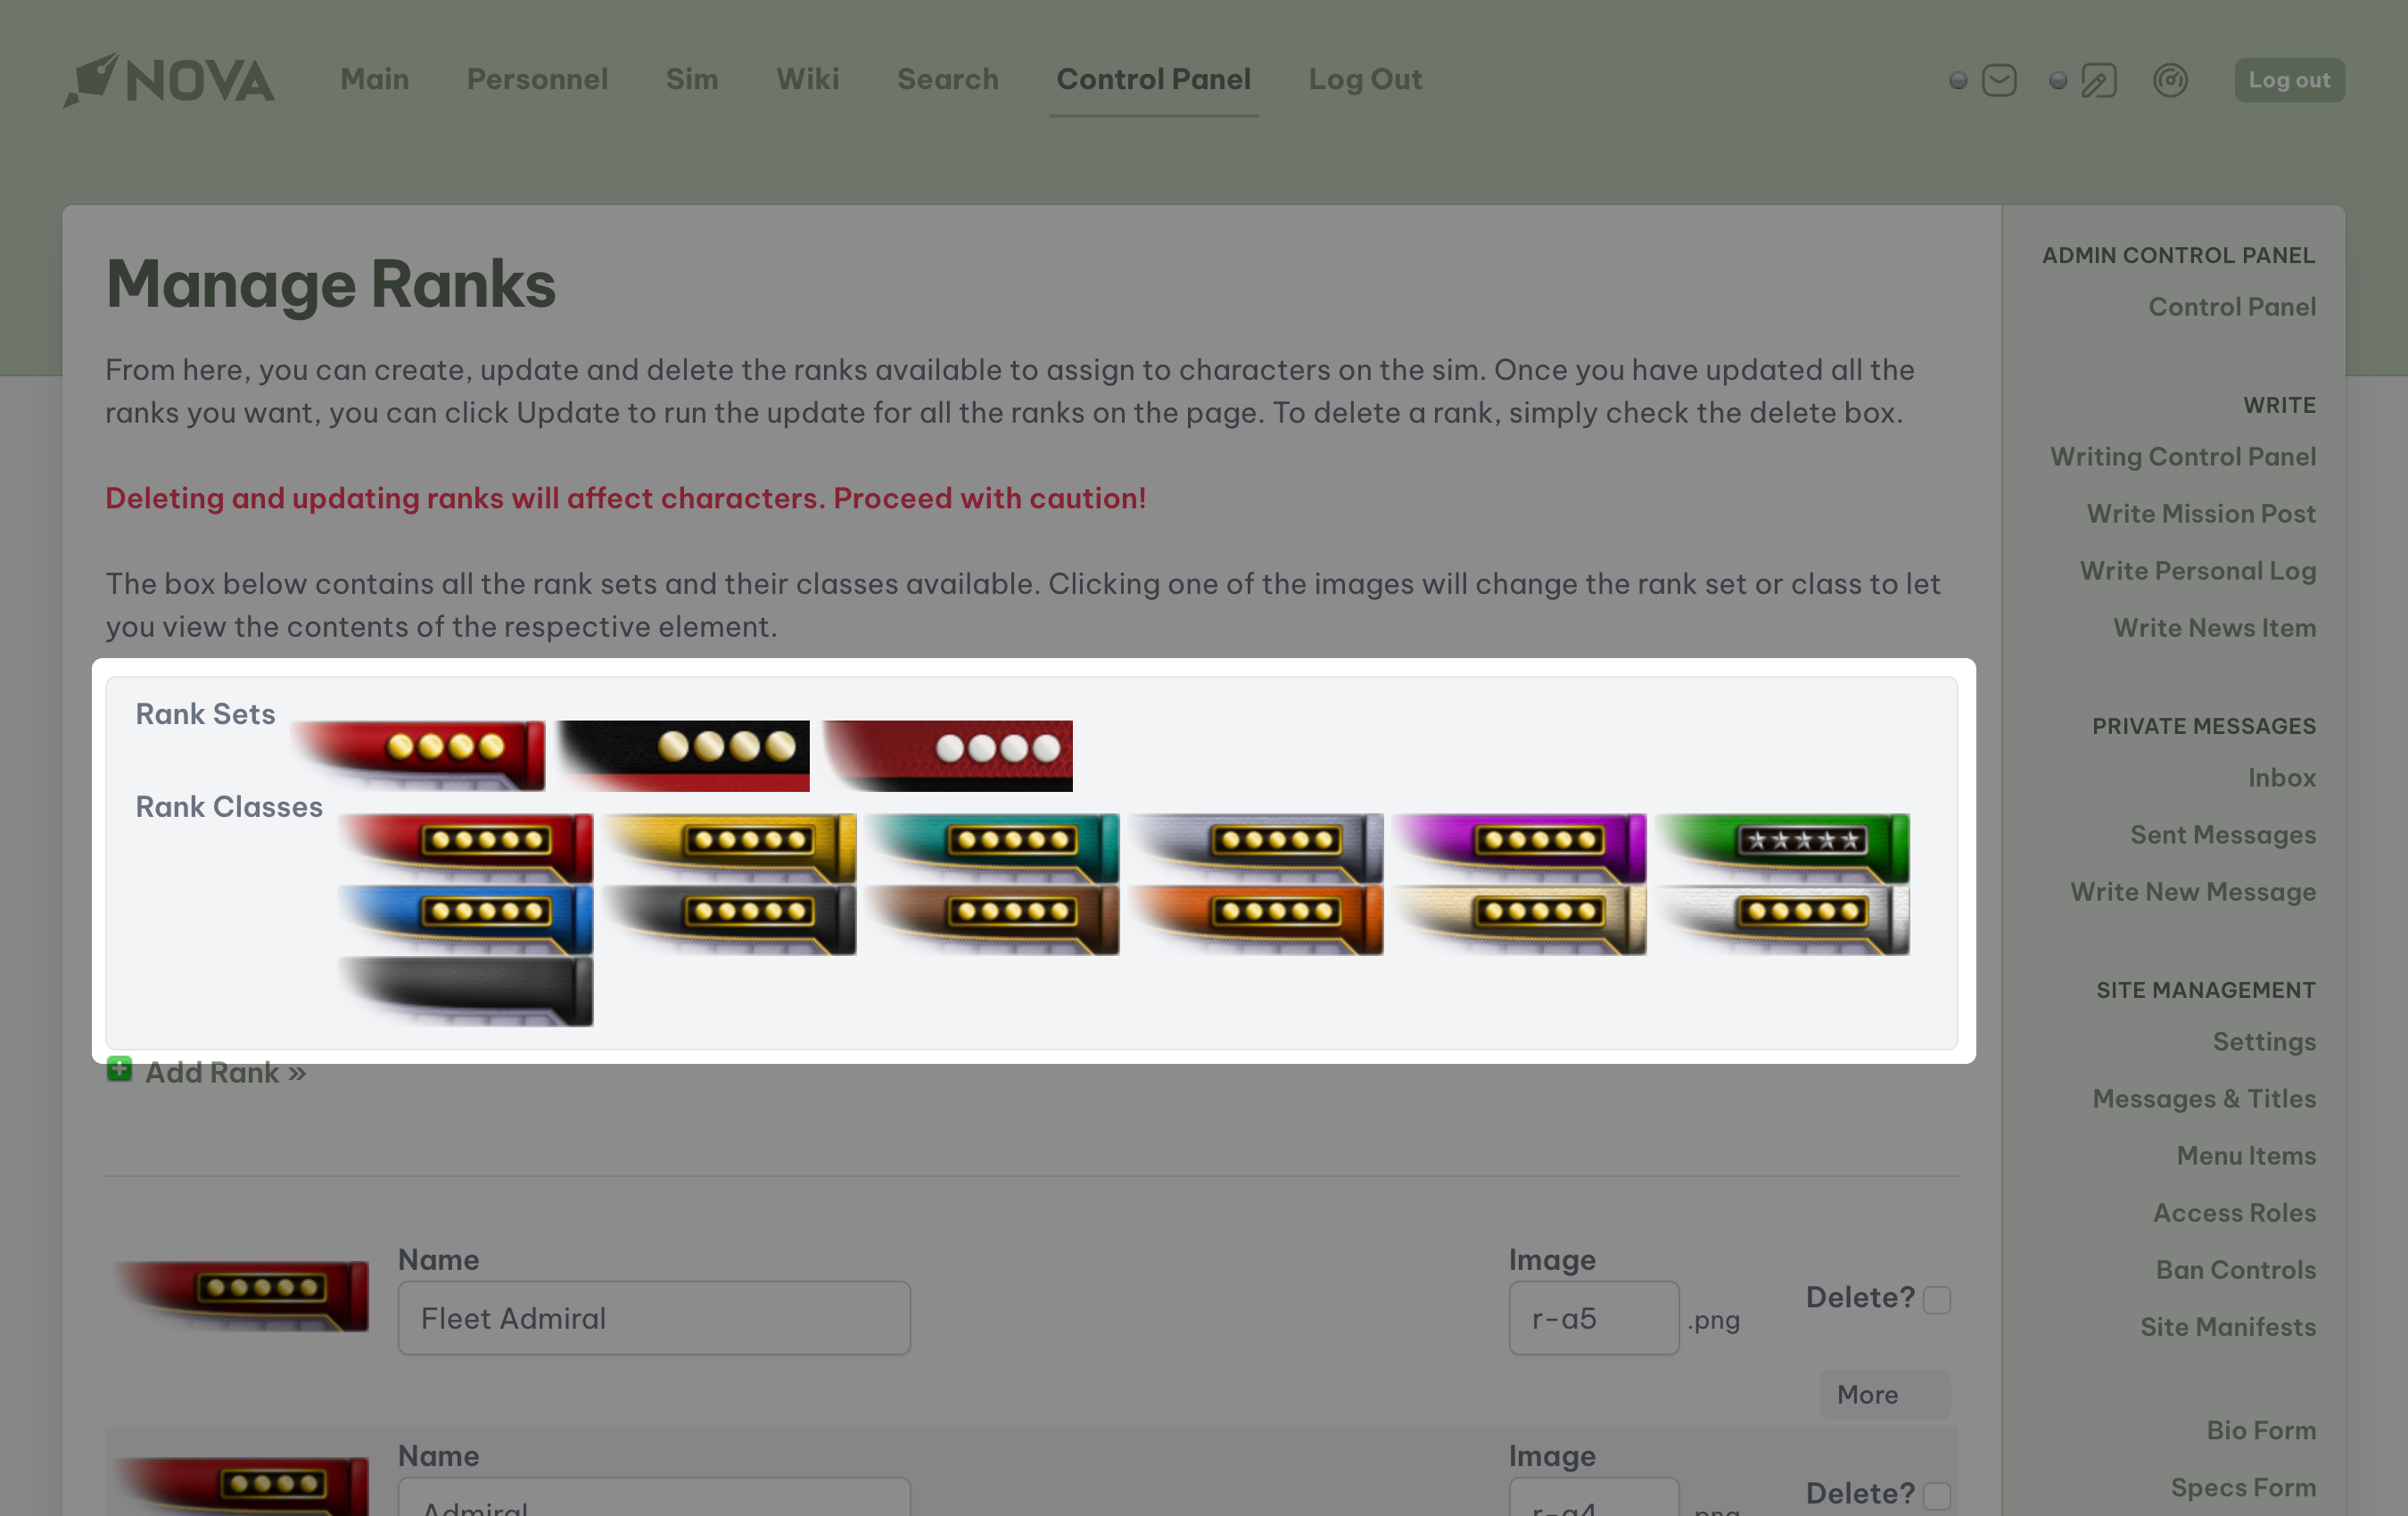
Adding a rank
Let’s walk through the process of creating a new rank. Let’s create a Lieutenant in a Star Trek Science Division. In Nova’s Control Panel, locate Ranks under the Management subheader on the sidebar.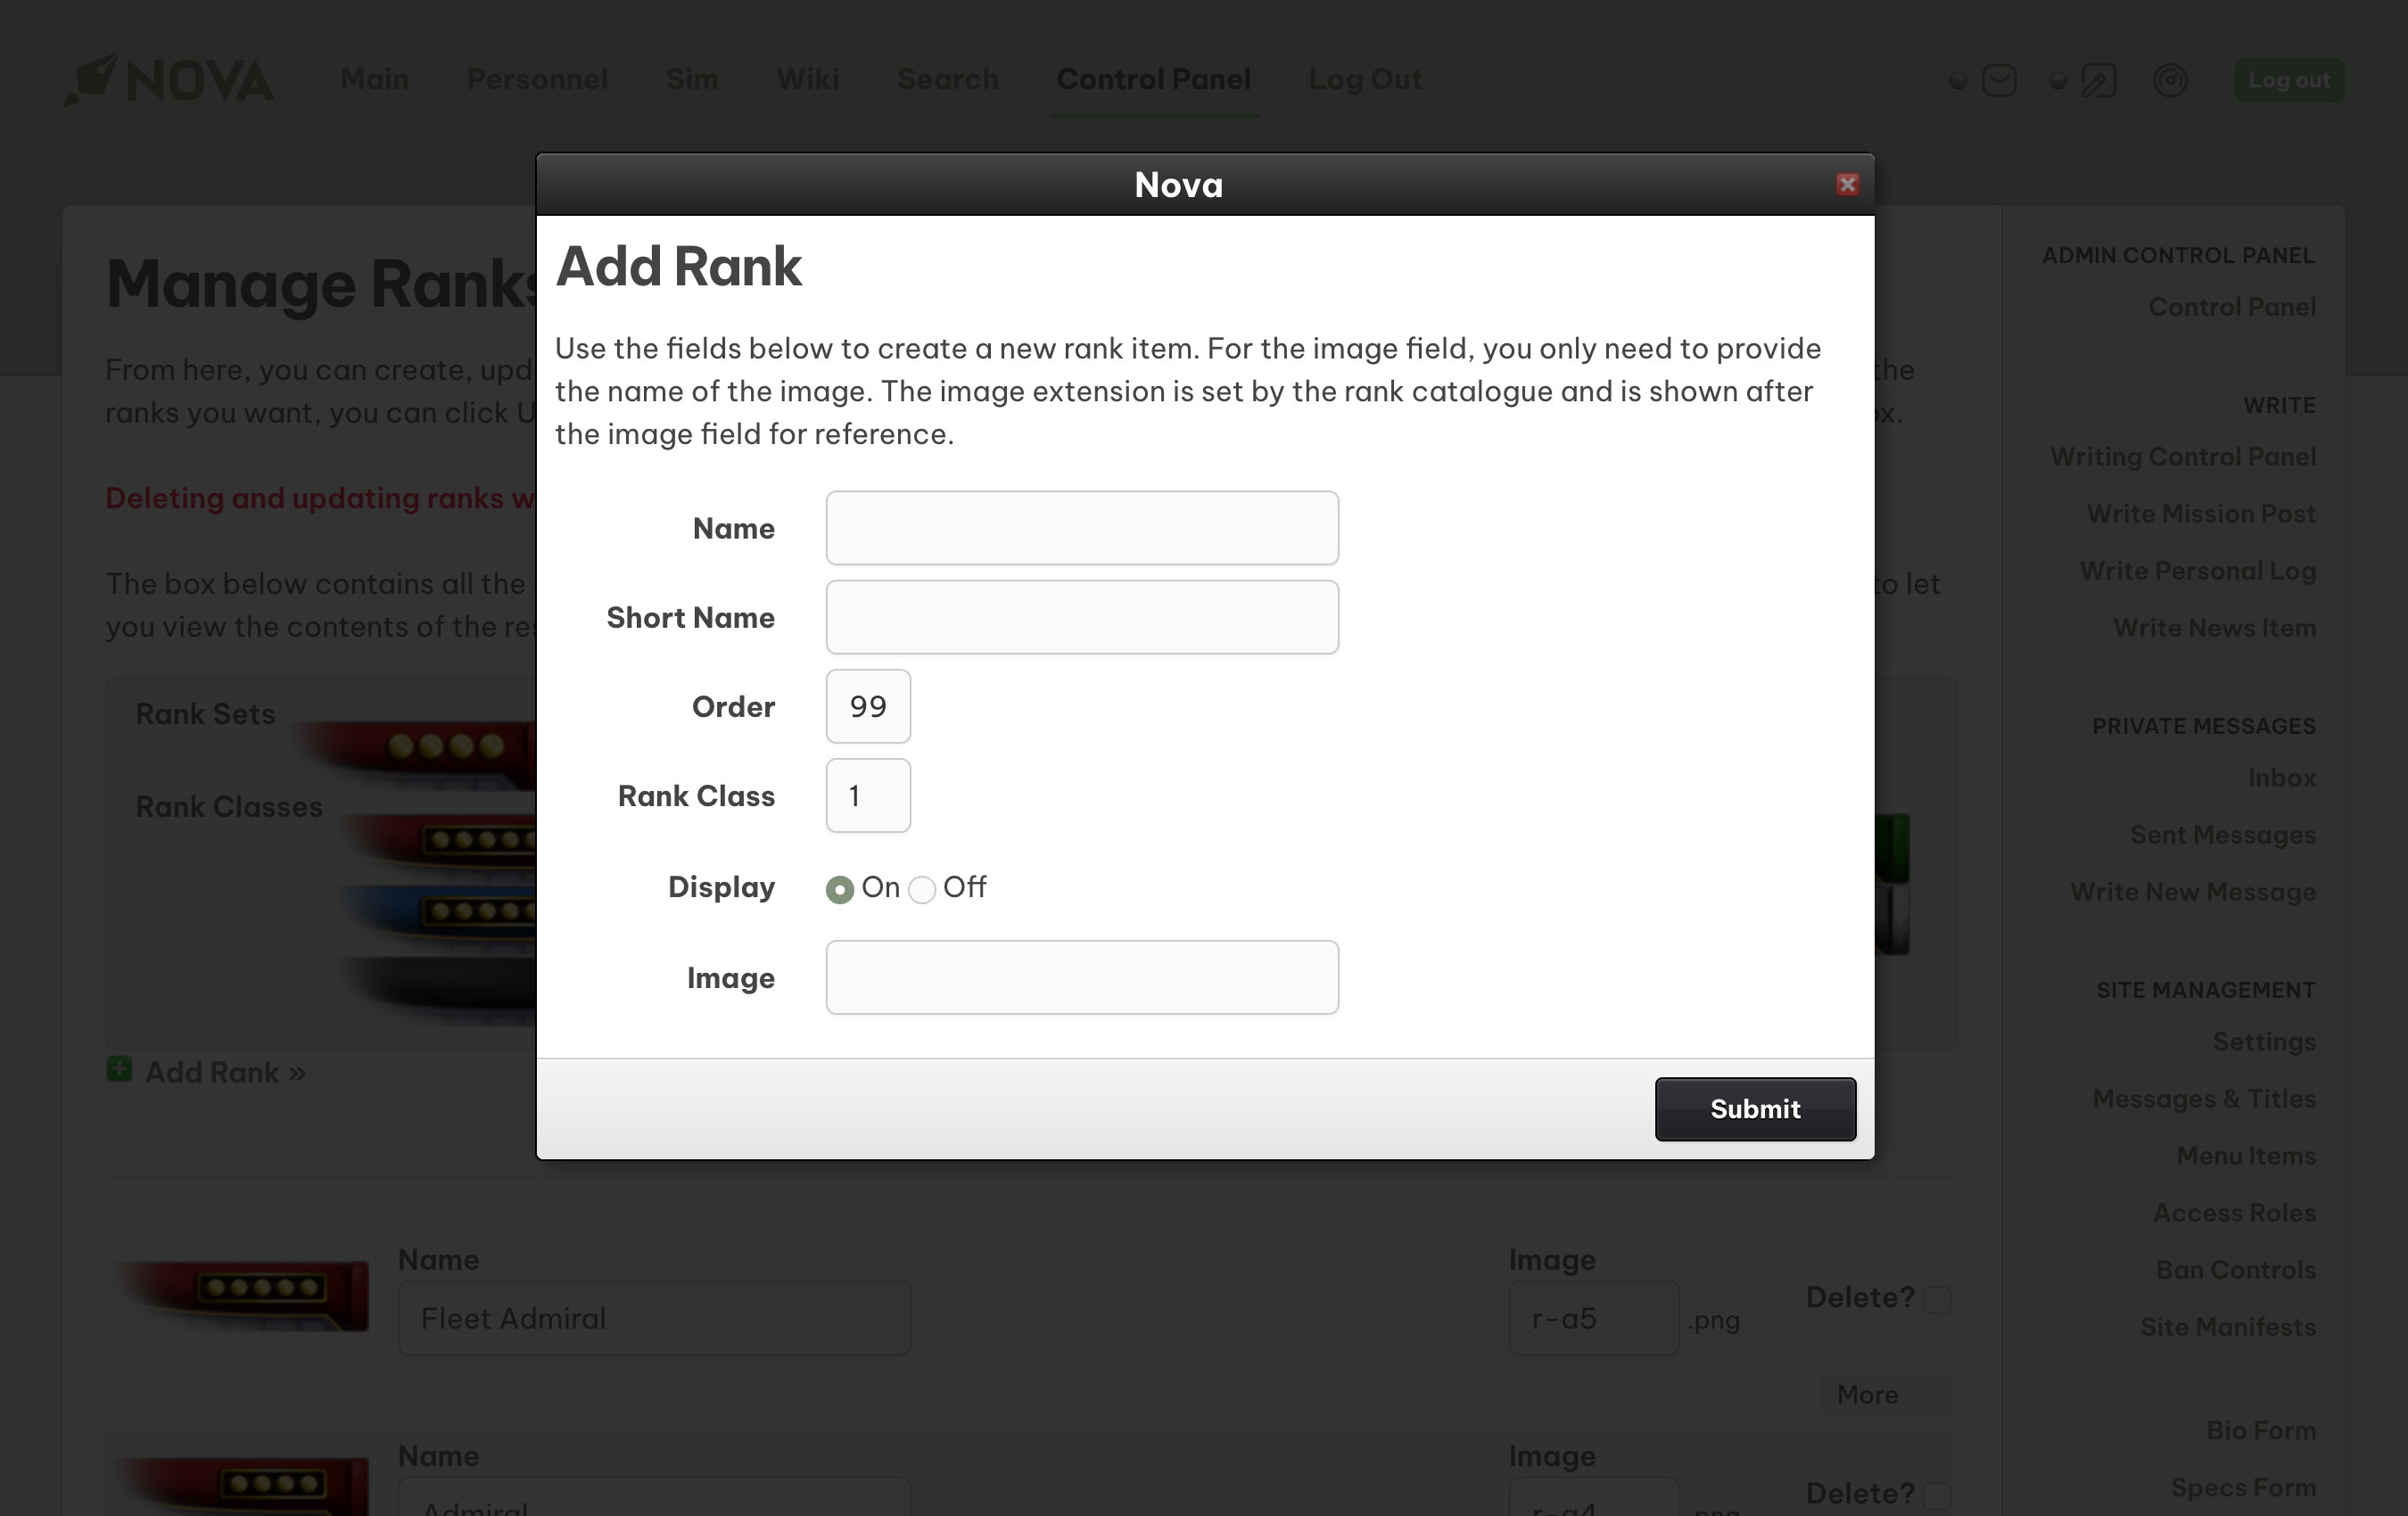
- From the Control Panel, locate Ranks under the Management subheader in the sidebar.
- Click Add A Rank. A dialog box (also called a modal) will appear.
- Fill out the information in the dialog box:
- Name: the name of the rank (e.g. Lieutenant).
- Short Name: an abbreviation of the rank (e.g. LT).
- Order: the position that the new rank will hold within the specific rank class. Enter a number ranging from
0(top of the list) to99(bottom of the list). - Rank Class: the particular image class this rank will belong to.
- If you are adding this rank to existing rank class, the easiest way to determine the rank class is to navigate to that particular rank class in Rank Management and see what value is being used in the rank class field and use that same value.
- You can also create a completely new grouping of ranks by using a number that isn’t used for any othe rank class. If you do this, it’s important to note that without an order of
0, a link to that newly created rank class will not appear in the navigation at the top of the page.
- Display: determine if you want this rank to be a selectable option for you or your players.
- Image: the filename of the rank image (not its location). Nova will automatically look for the image within a specified rank set based on whatever the site/user’s active rankset is. Do not include the file extension as the system will only look for the extension assigned to the rankset in the Rank Catalouge.
- Click Submit and the rank will be added to the system.
Modifying a rank
To modify any existing rank that is available in Nova, access Nova’s Control Panel, and locate Ranks under the Management subheader on the sidebar.
More button. You can edit as many ranks as you need in the selected Class at a time, but you will lose your changes if you select a different Class. Be sure to hit the Update button at the bottom of the page before navigating to a new class.
Remove a rank’s name and/or abbreviation
If you are operating a game that does not wish to use ranks, or would have rank-less characters mixed in with characters with ranks, you may want to have a blank rank for that character. To remove a Rank’s name and/or abbreviation, follow the instructions above for Modifying existing Ranks. When you select the Rank you wish to edit, simply erase the name and/or the abbreviation, then select Update at the bottom of the page.Adding a rank class
While most Star Trek Nova installs provide plenty of rank classes to use in the game, sometimes you’ll want to add a new rank class (color/design) to all of your rank sets.- Create a new rank item
- Set the rank order to 0. This ensures that the new rank color/design appears in the rank classes at the top of the page.
- Set the rank class to a number 1 higher than the highest rank class in use. (You can find this by going to the last rank preview image and seeing what number is used for that rank class.)
- Finish creating your rank item
Removing a rank and/or rank class
Most Star Trek Nova installs provide up to 13 different rank classes for use in the game. These classes are also automatically visible, making them available for use by players creating NPCs, or Game Masters assigning ranks to new characters. If you would like to disable one or more Ranks or Classes, access Nova’s Control Panel, and locate Ranks under the Management subheader on the sidebar.- Select the Class for the Rank(s) you wish to remove, and then locate the desired Rank(s).
- Select the More button to reveal the advanced options.
- Change
Displayfrom Yes to No. - Scroll to the bottom of the page and click Update.
Adding a rank set
All fresh Nova installations (except for the Blank Installer), come with only one rank set. New rank sets are available at the Nova Add-ons Exchange or Kuro-RPG. Once you have downloaded (or created) your new rank set, you will need to access your Site via FTP software, or your webhost’s cPanel (or equivalent) software. Please refer to the instructions you received from your webhost when first creating your account with them.Uploading the rank set
Access your Site’s files, and navigate to theapplication\assets\common\{genre}\ranks directory. The directory will have a different name for your Site, such as ds9, tos, blk, etc. This directory identifies which installer was used to first build your Site.
You will notice that the ranks directory will already contain a default directory. That directory contains the pre-installed images for the base rank set.
Upload your new rank set to the ranks directory. If you are uploading a ZIP file, please be sure to extract the contents after the upload is complete.
Open the new directory and ensure that you see image files, and not additional directories. If your rank images are not immediately visible, then your Nova software will not be able to see them either.
Installing the rank set
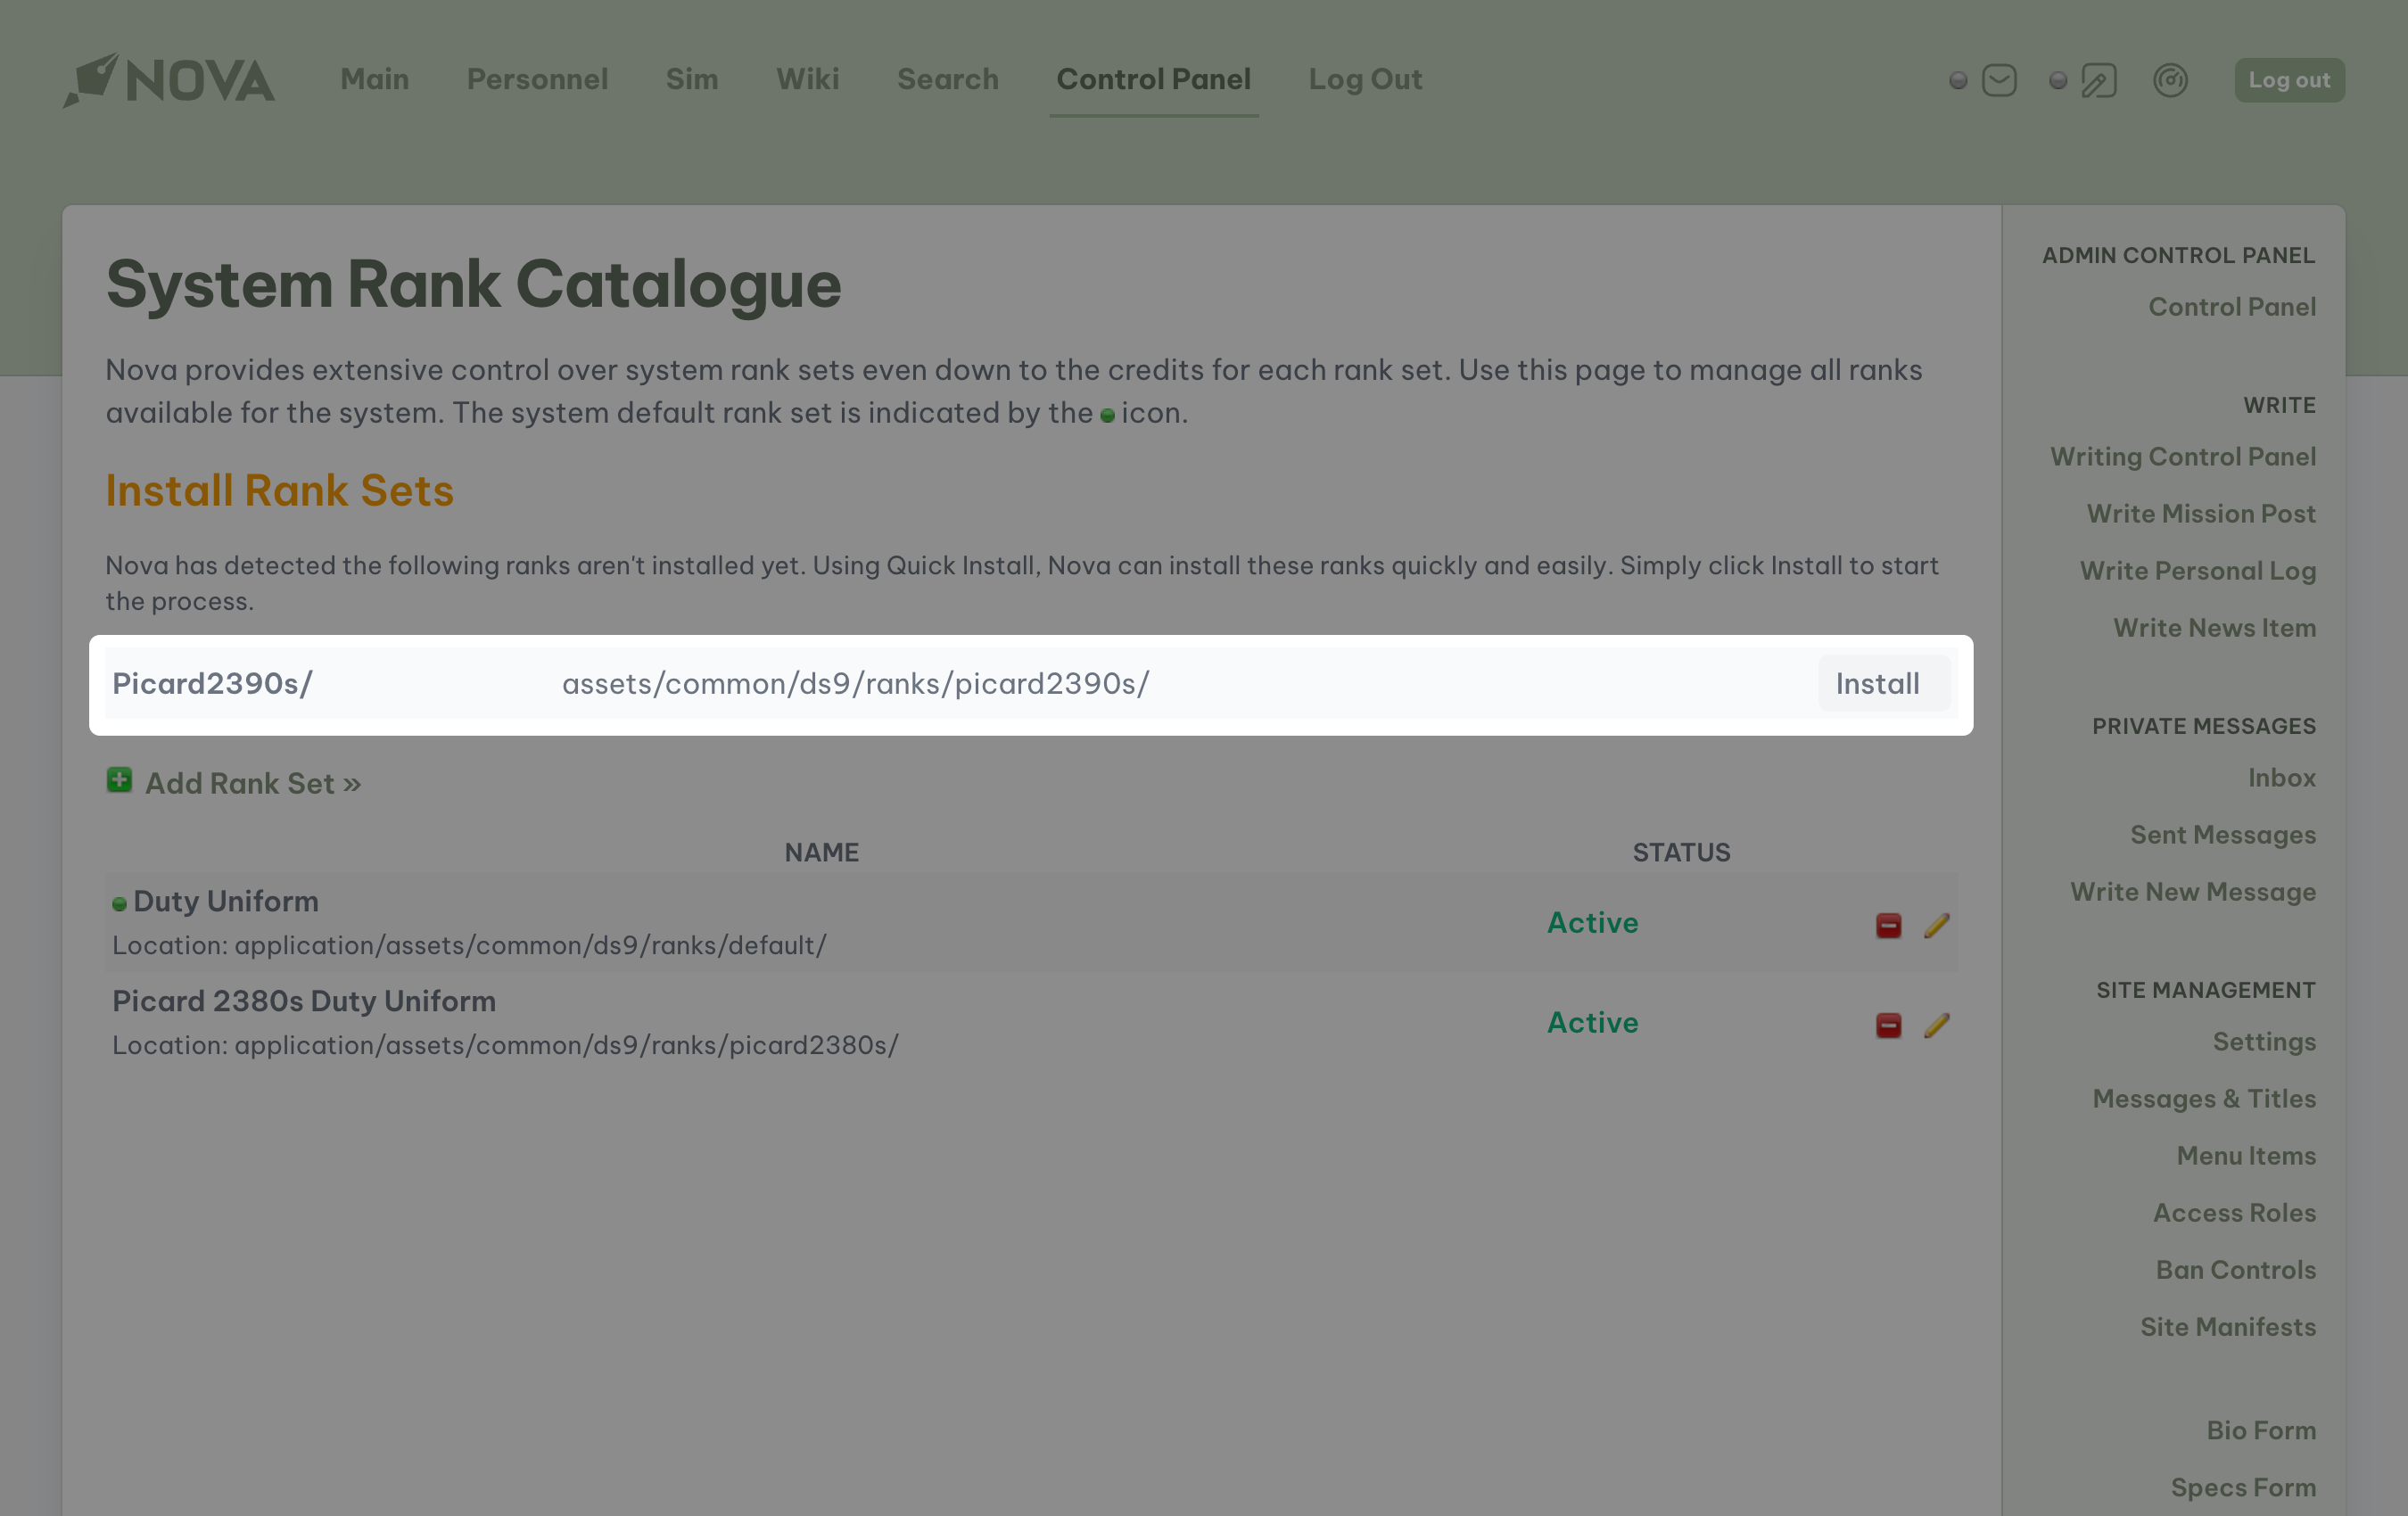
To install your new rank set, access Nova’s Control Panel, and locate Rank Catalogue under the Site Management subheader on the sidebar. Some downloadable rank sets contain arank.yml file. Nova will automatically detect this file and will provide a button at the top of the Rank Catalogue page to easily install the rank set.
rank.yml file to upload with the set to streamline installation. A typical file looks like this:
rank.yml
rank.yml file, but Nova does not detect it, please check your File Manager to ensure that the rank set was uploaded to the right location and that the files are visible.
If your rank set does not contain a rank.yml file, and is uploaded to the correct location, you will have to manually install your rank set. You can do this by clicking the Add rank set option at the top of the Rank Catalogue page.
The available options are:
- Name: the name of your rank set.
- Genre: the genre your set belongs to. For best results, this needs to match the genre which you used to install the Nova Software.
- Server Directory: the name of the directory containing the rank set. Do not include the full
application\assets\common\{genre}\ranksdirectory again, only the name of the new directory. - Preview Image: the filename of an image that can be used to preview the entire set.
- Blank Image: the filename of an image background that is representative of the set.
- Image Extension: the file extension of all rank images in the directory, such as
.pngor.jpg. - Status: the stage in which the rankset exists.
- Credits: any artistic or intellectual property credits associated with the rank.
- Default rank set: Select whether or not you would like this rank set to be active for New Players.
Changing rank sets
Once you have more than one rank set installed, you can freely change between them at any time. To change the rank set that appears for all users, specifically for those who are logged out, access Nova’s Control Panel, and locate Settings under the Site Management subheader on the sidebar. Select the Appearance tab, and locate rank set under Display Options. Once you have selected your rank set, scroll down and select the Submit button.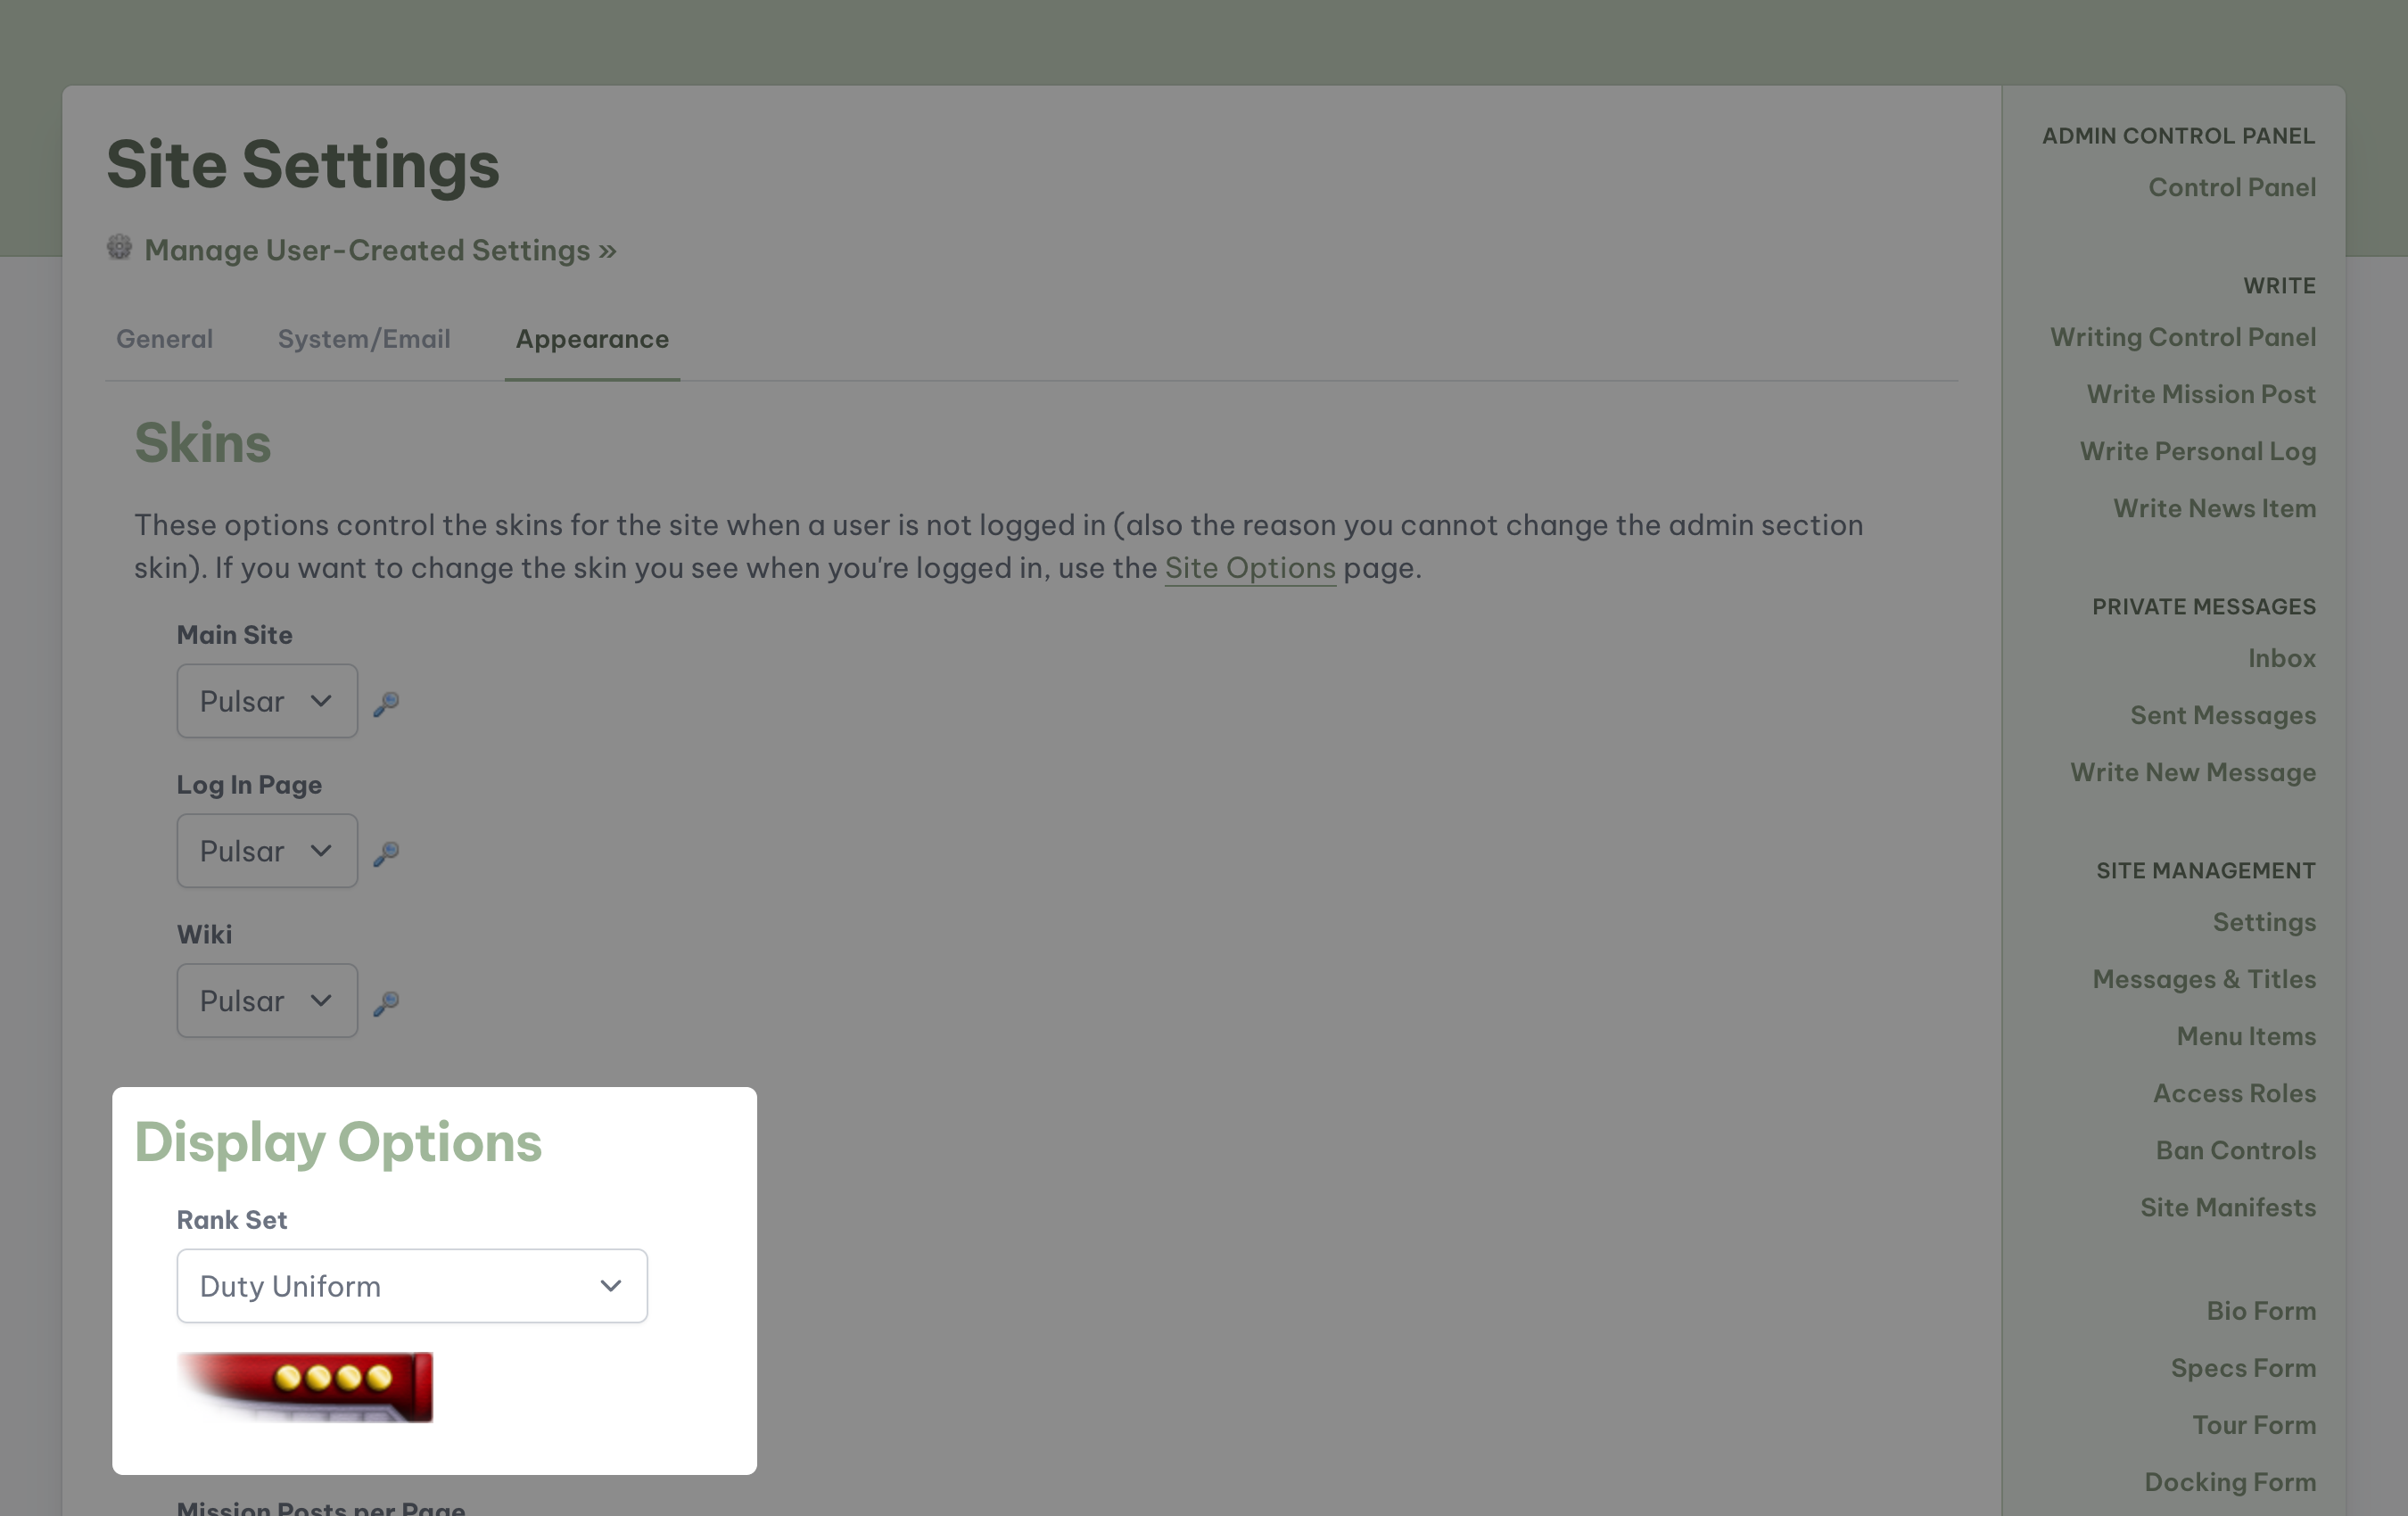
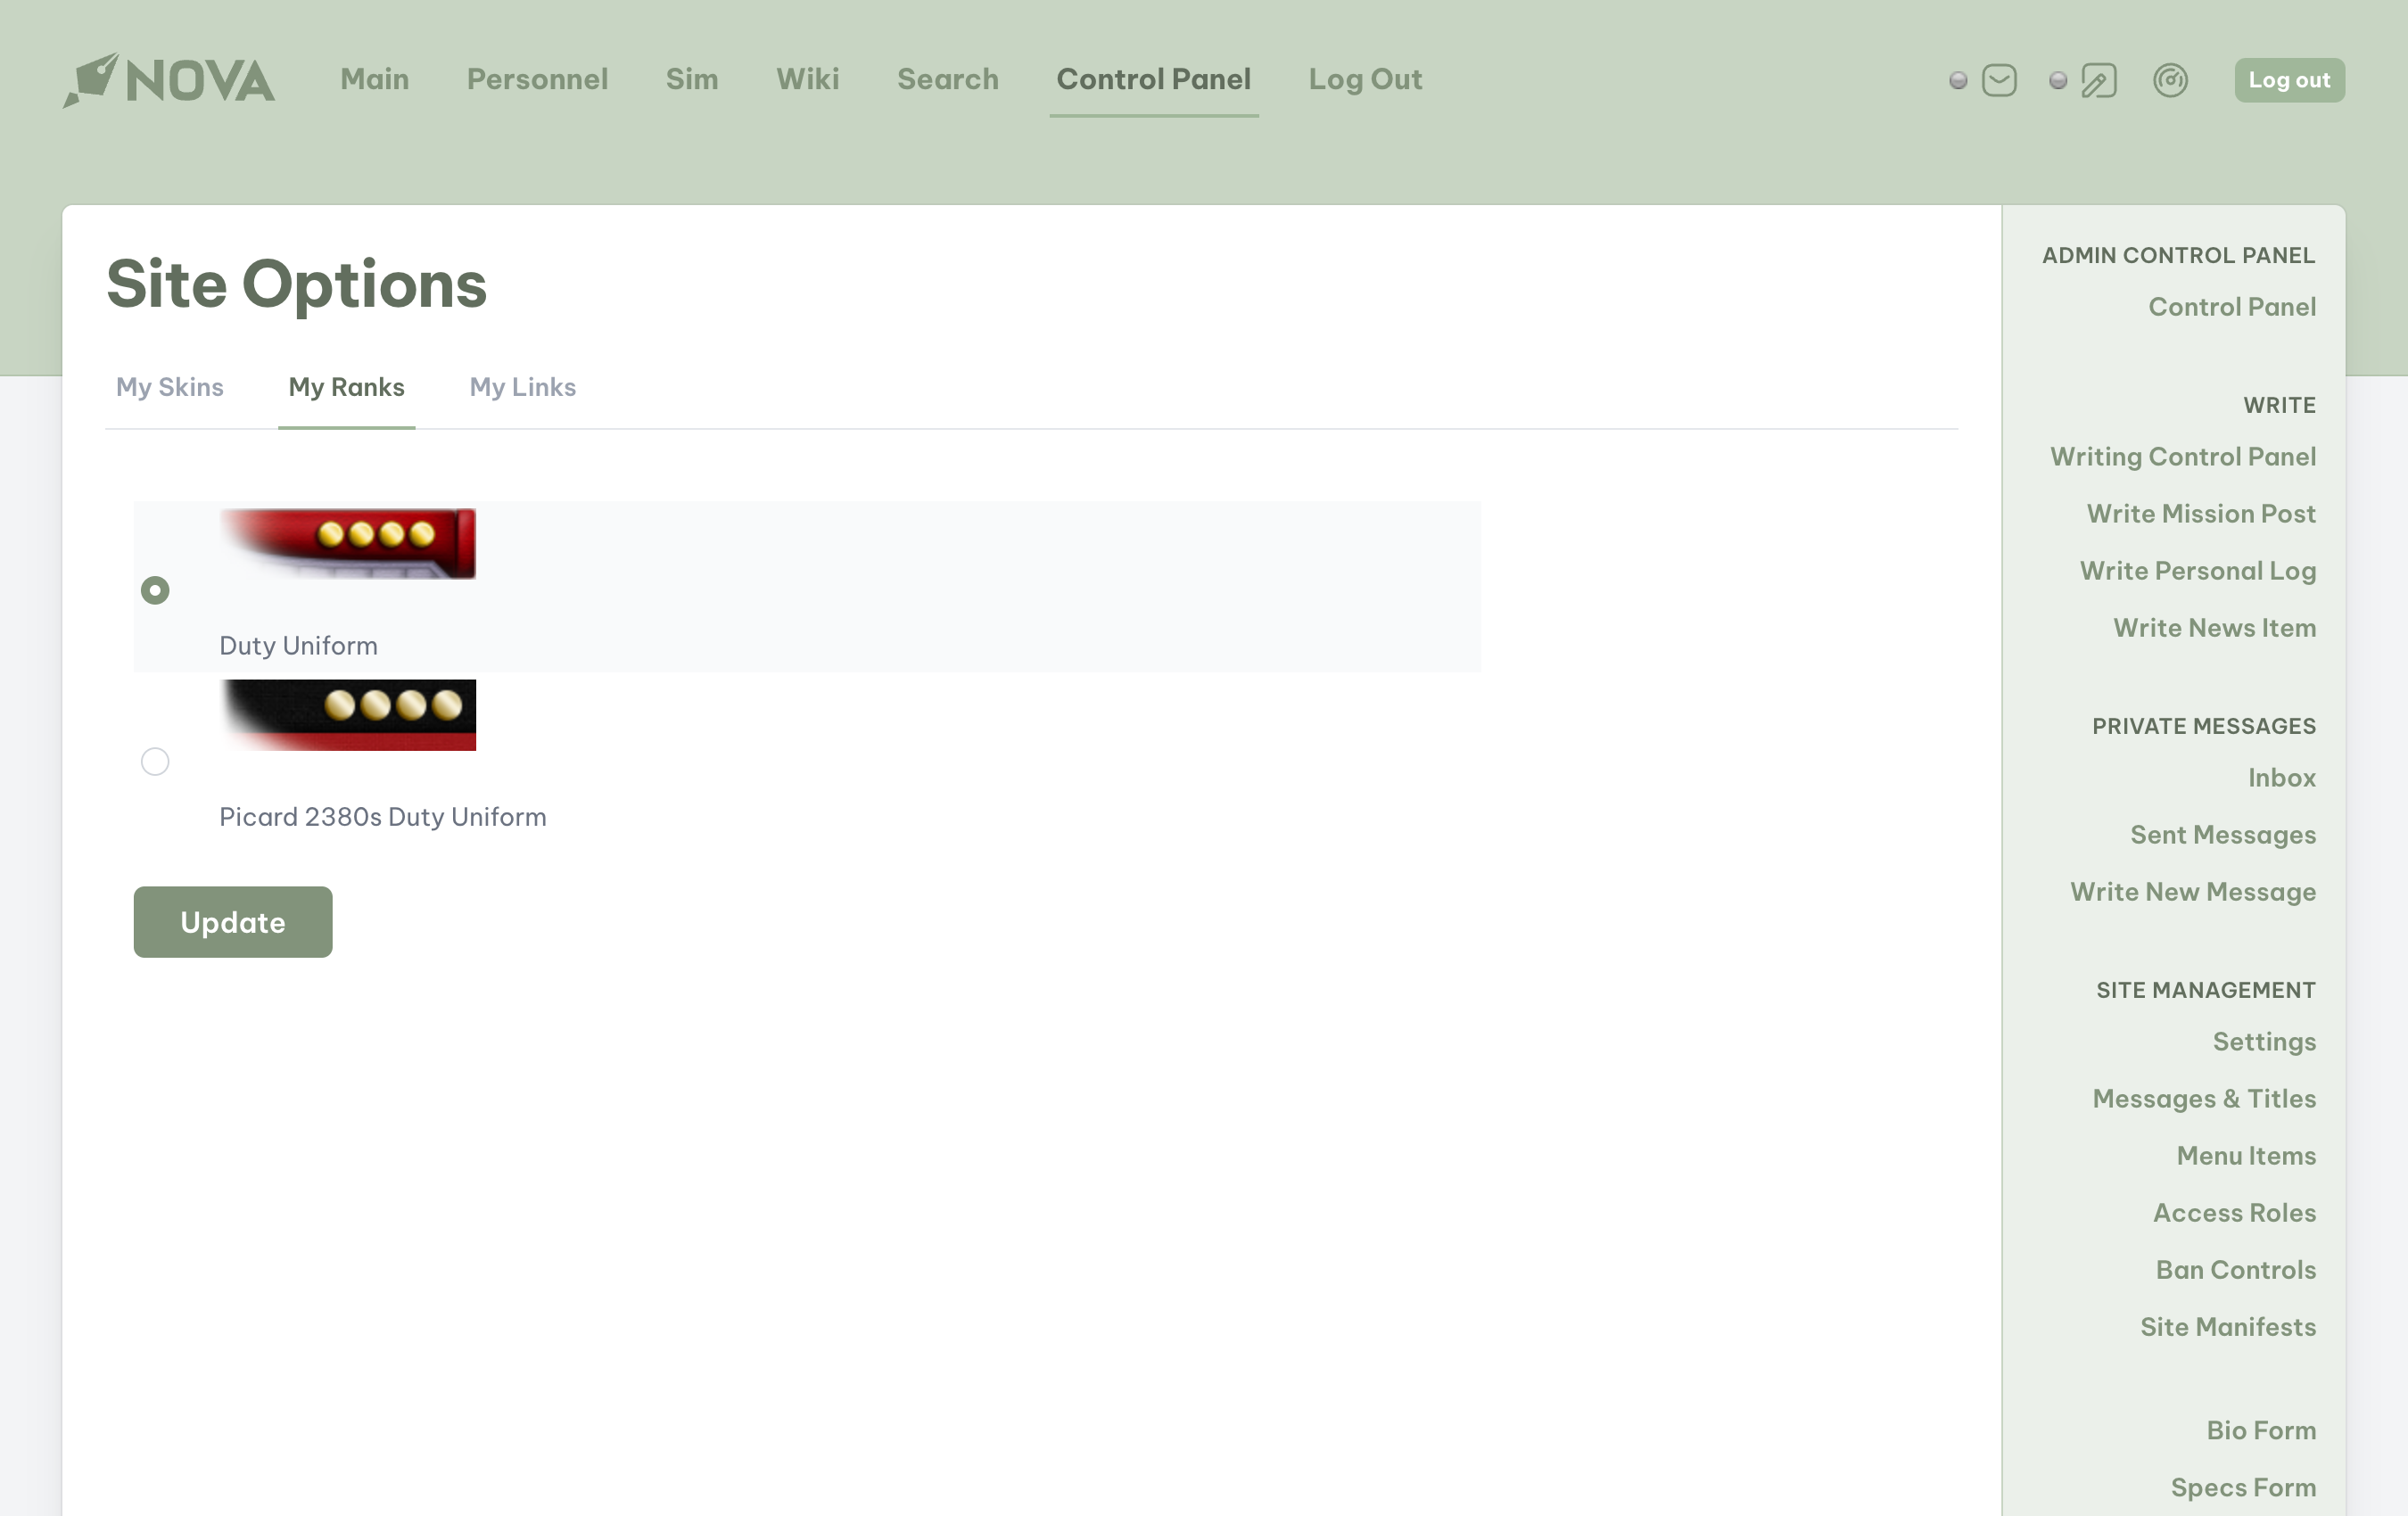
- At the top of the page, find the Dashboard icon.
- A popup (modal) will appear in the center of the screen. Select Edit Site Preferences.
- Select the My Ranks tab.
- Select your desired rankset, then click Update.